DCP-T310

Unboxing + Setup
A. Unpack the Machine and Check the Components
- 4 Bottles of Starter Inks - C M Y BK
- Quick Setup/Product Safety Booklet
- USB Cable
- Power Cord
- Brother Installation Disc

In Case your Laptop or Desktop Computer do not have a DVD Drive, you can click here to download the required softwares
- Remove all the blue visible plastic tapes then Plug in the power cord at the rear of the printer and turn on the machine
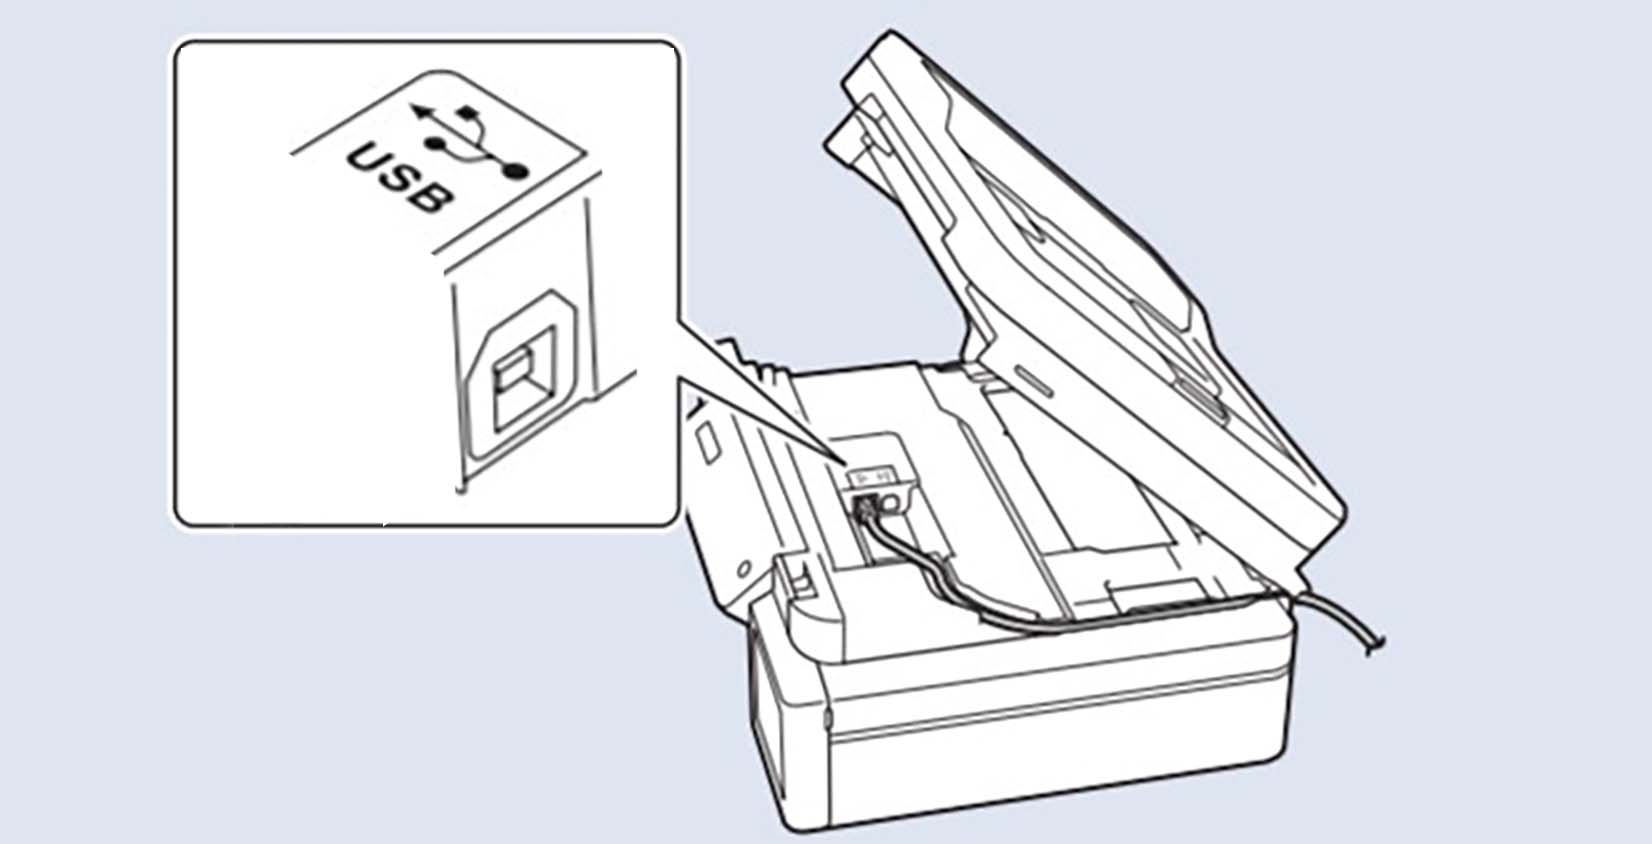
- Open the lid and connect the USB cable onto the printer as shown below
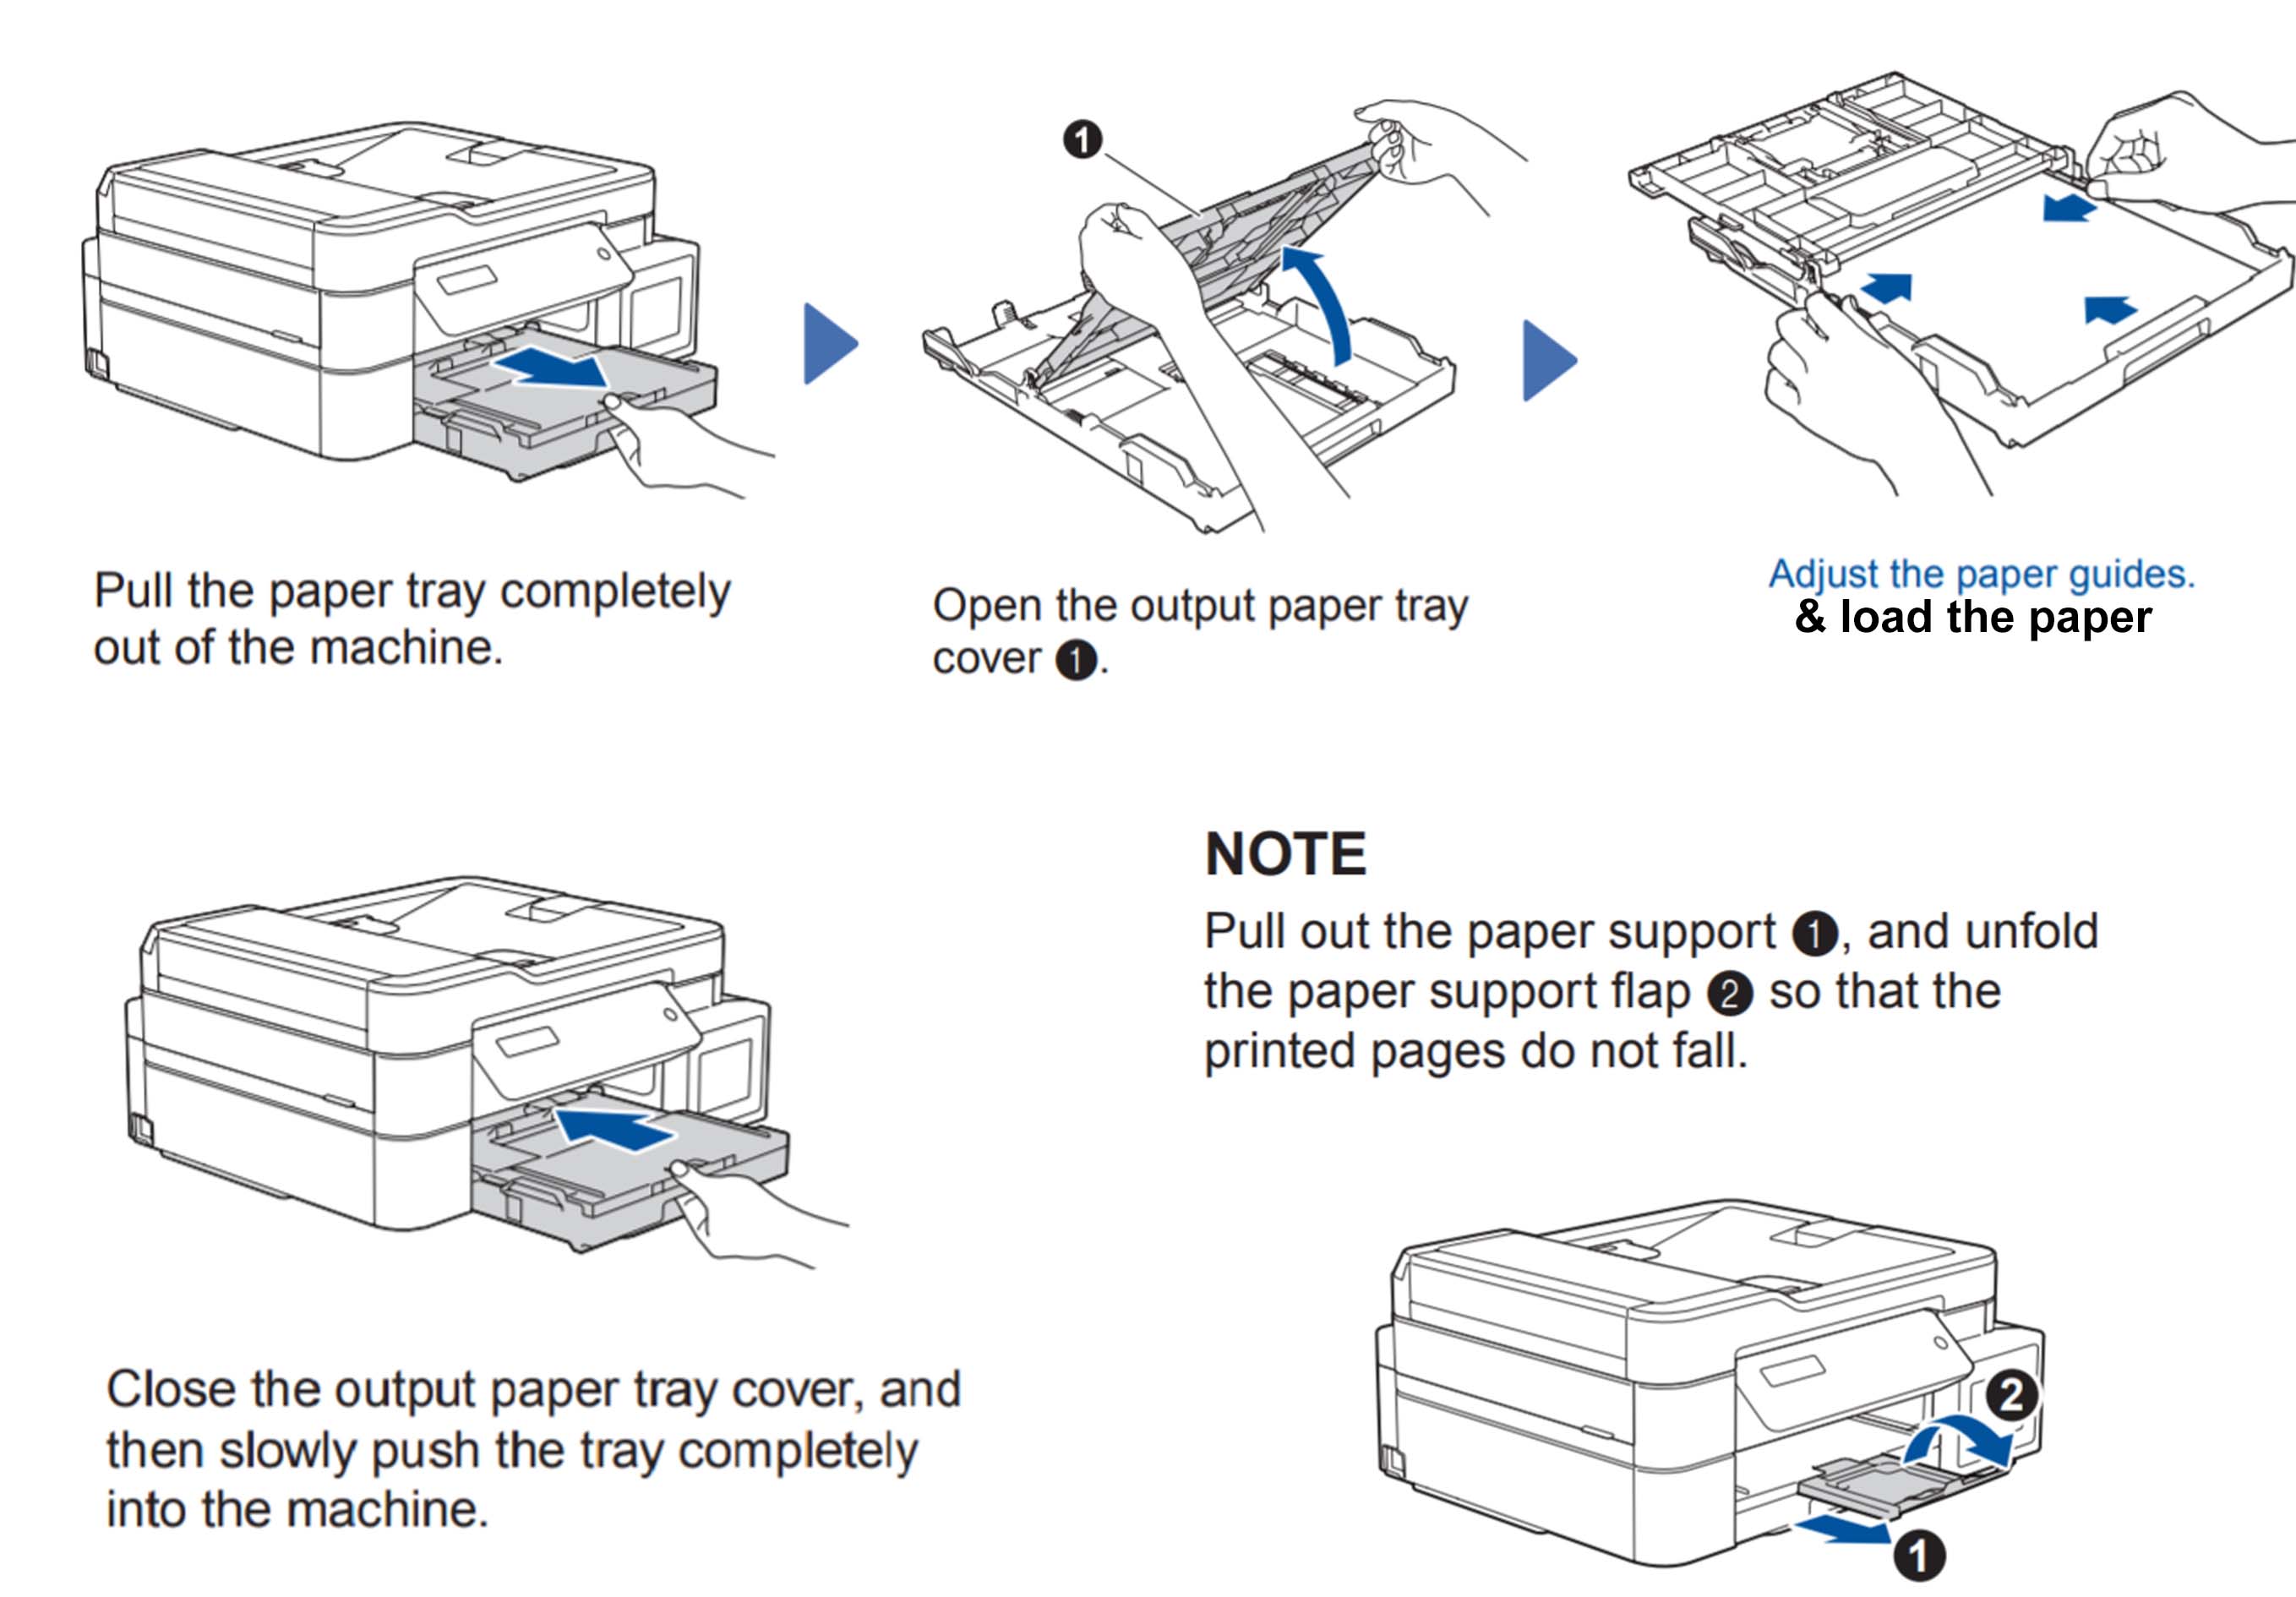
- Gently close the lids and remove the paper tray to load paper
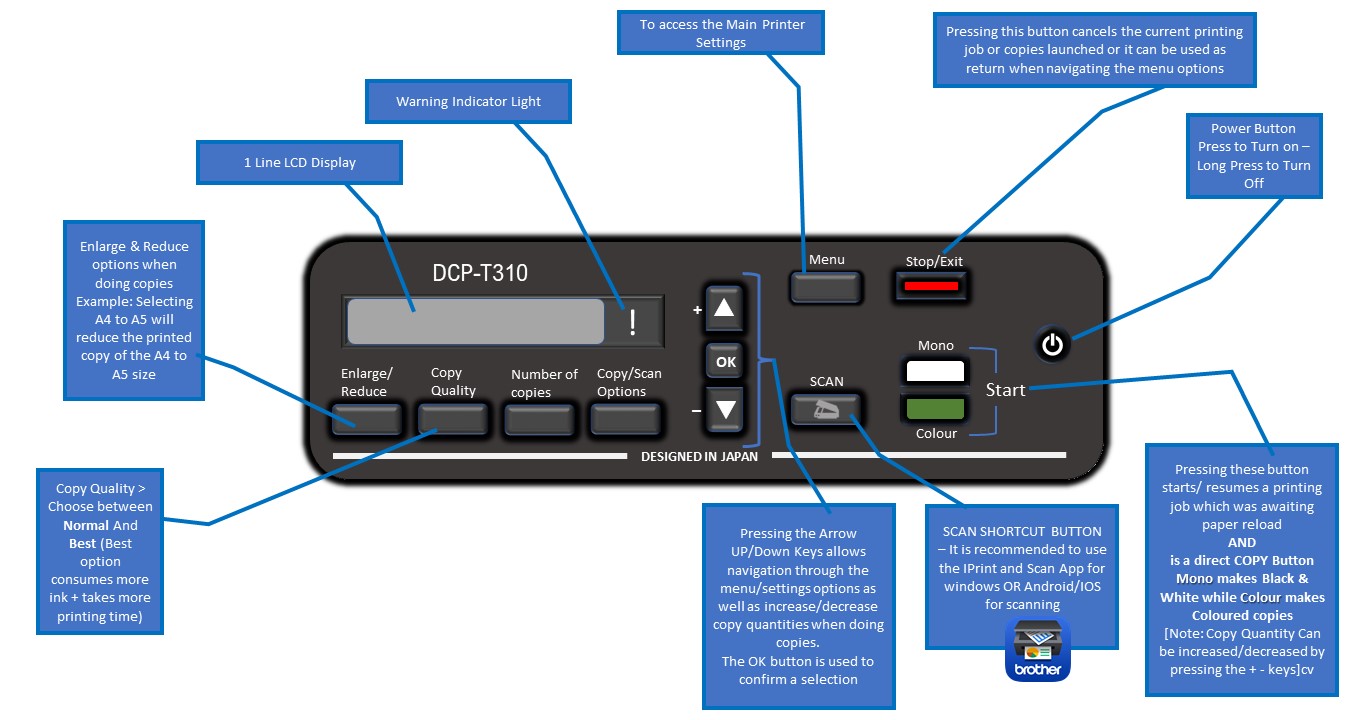
- Setting Up The Country/Date and Time Before we proceed, it is important to understand the control panel and the buttons available as shown below..
B. Turning on the machine and filling the ink tanks for first time use

[ii] When Machine Prompts Others?, Press OK

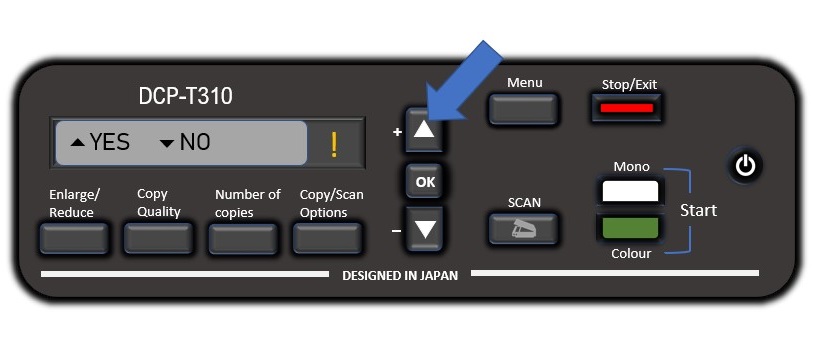
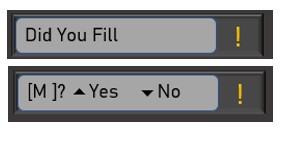
[iii] When Machine Prompts YES NO?, Press YES [Arrow Up Key]
[iv] When Machine Prompts Date and Time, Press OK and Use [Arrow Keys Up/Down to Input the date and Time]

[v] When Machine indicates Fill Ink Tanks, Open the Ink Compartment Cover and start Filling the inks

First of all, Identify the Correct Ink Tank Compartment..i.e. M will go into M Compartment and so on.
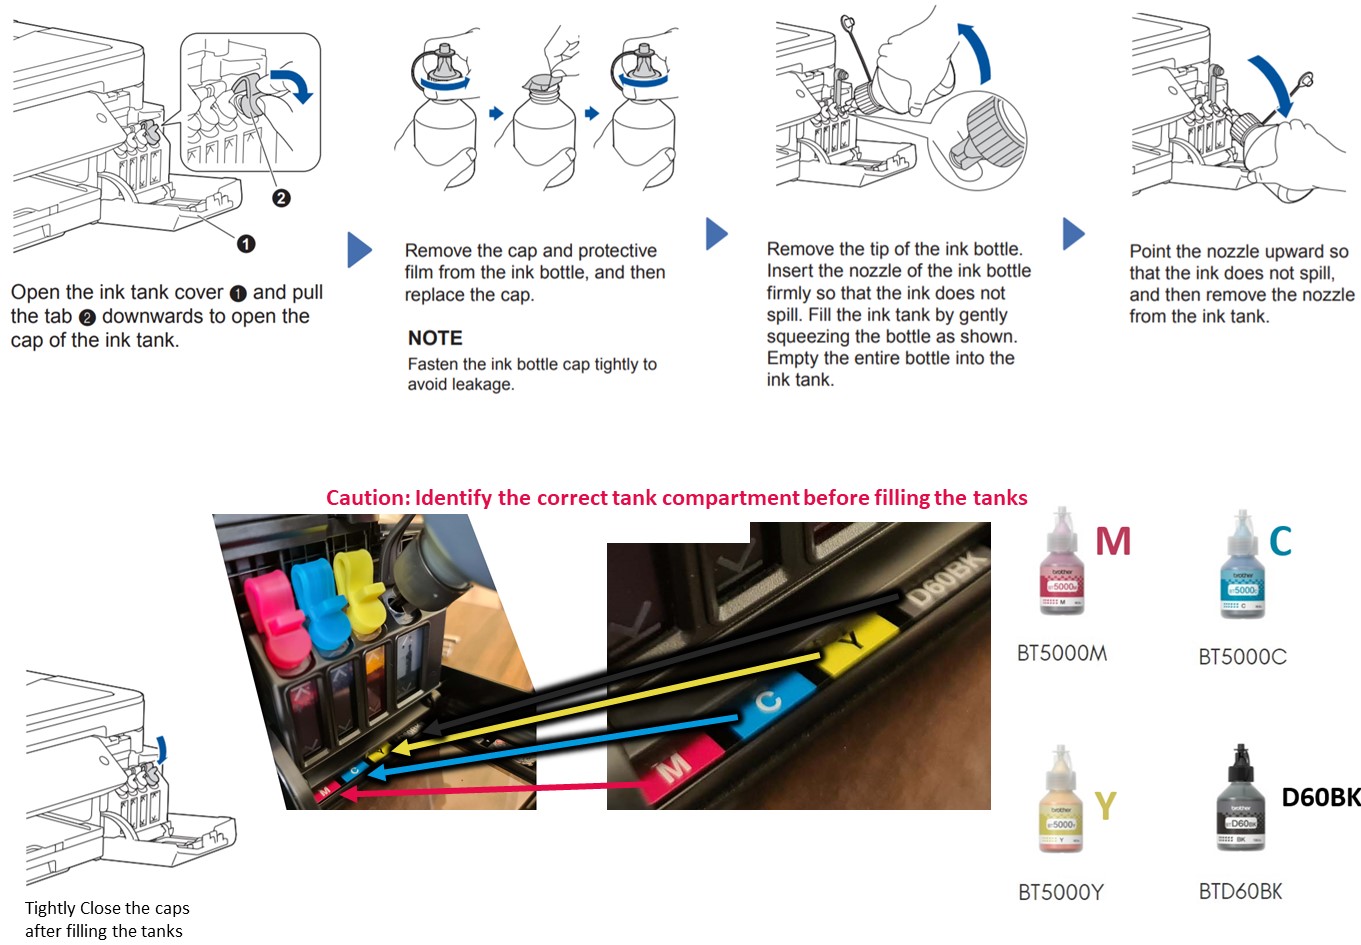
[vi] After Closing the Ink Tank Cover, Machine will Prompt Did you Fill [M?] [C?] [Y?] [BK?] Press Arrow Key UP FOUR times to confirm Refill for all the 4 colours
[vii] Machine will now initialise by starting the cleaning process, which is infact filling the printing circuit with inks... Please wait as this process should take 7-10 minutes. Do not move/disconnect or press any button during the cleaning process.

[viii] After the process is completed, machine will prompt to set paper and press start.. Load the paper if not yet done as indicated in Part B (3) and press Start to start Printing

[ix] A Quality Test Sheet will come out having squares for the 4 colours. If everything is Aligned Squarely and there is no unusual gap, press the Arrow UP [Yes] to confirm Quality.


